How To Put Lashes Under the Lash Line
For decades, we’ve been limited to lash enhancement that sits on top of our natural lashes, weighing them down and making them feel uncomfortable and brittle. Even salon lashes are applied to the top of the natural lash, and the weight of the glue and extension can cause some lashes to break.
New Underlash Technology™ turns everything we know about lash extension application upside down. This method of applying lash extensions beneath the natural lash has numerous benefits, including an uber-comfortable, weightless feel that most users prefer to traditional lash extensions.
The Lashify® team will explain how it works and how to apply lashes under your lash line and give you all the info you need to get natural, salon-looking lashes at home. Get ready; you’re going to have to break up with your lash tech.
What Are the Benefits of Underlash Technology?
Full-volume lashes are undeniably dramatic. They’re also undeniably heavy. Even classic lash extensions, which are typically applied on a 1:1 ratio of one lash extension to each individual eyelash, can cause your natural lashes to feel weighed down.
While most people have eyelashes that measure about a third of the width of their eye, or roughly 5mm-9mm, some lashes (like inner corner lashes) might only measure .03mm in length. Attaching a lash extension fiber to these delicate lashes can not only feel heavy but could cause them to break.
Underlash application solves a lot of the discomfort issues you might have experienced from traditional lash extensions.
Weight
Wearing your lash extensions beneath your lashes helps them feel lighter and more comfortable. If you’ve ever had the sensation that your eye was closing after getting traditional lash extensions applied, under-the-lash extensions are a better option.
Look
Even if you want an incredibly dramatic fringe, you still want it to look believably natural, with no visible glue, weird application issues, or lifting edges. Both salon lash extensions and strip lashes can look obviously artificial.
Applying lash extensions beneath the natural lash is a great way to help them look more natural. It’s virtually impossible to see the band of the extensions, and the lashes naturally blend upward into your natural lashes instead of away from them like when they are applied on top.
Application
The lash pros at Lashify have tried a lot of lash enhancement methods over the years. For adding length and fullness, nothing compares to extensions.
The problem was that you only had two real options: professional salon application that took a lot of time and money or at-home strip lashes that were incredibly hard to apply. Underlash application makes at-home lash application a cinch.
Because the lash extensions get applied under the natural lash line, it’s a more forgiving process. That means that if you aren’t able to apply your lash extensions perfectly, there’s less chance your tiny mistake will be noticeable.
It’s also really easy to remove and reapply lashes when they’re applied under the natural lash. Now that you know the why behind Underlash Technology™, it’s time to understand the how.
Getting Started With Lashify
Lashify is the DIY Lash Extension™ System that allows you to Be Your Own Lash Tech™. Lashify is the original inventor of Underlash Technology, and our Gossamer® lashes were specifically designed to be placed underneath your natural lash line.
We’re pros at underlash application, and with about three applications of Lashify Gossamer lashes, you’ll be a pro too. You can find tutorials and answers to frequently asked questions about application here.
Before you begin, you just need to get the Control Kit™.
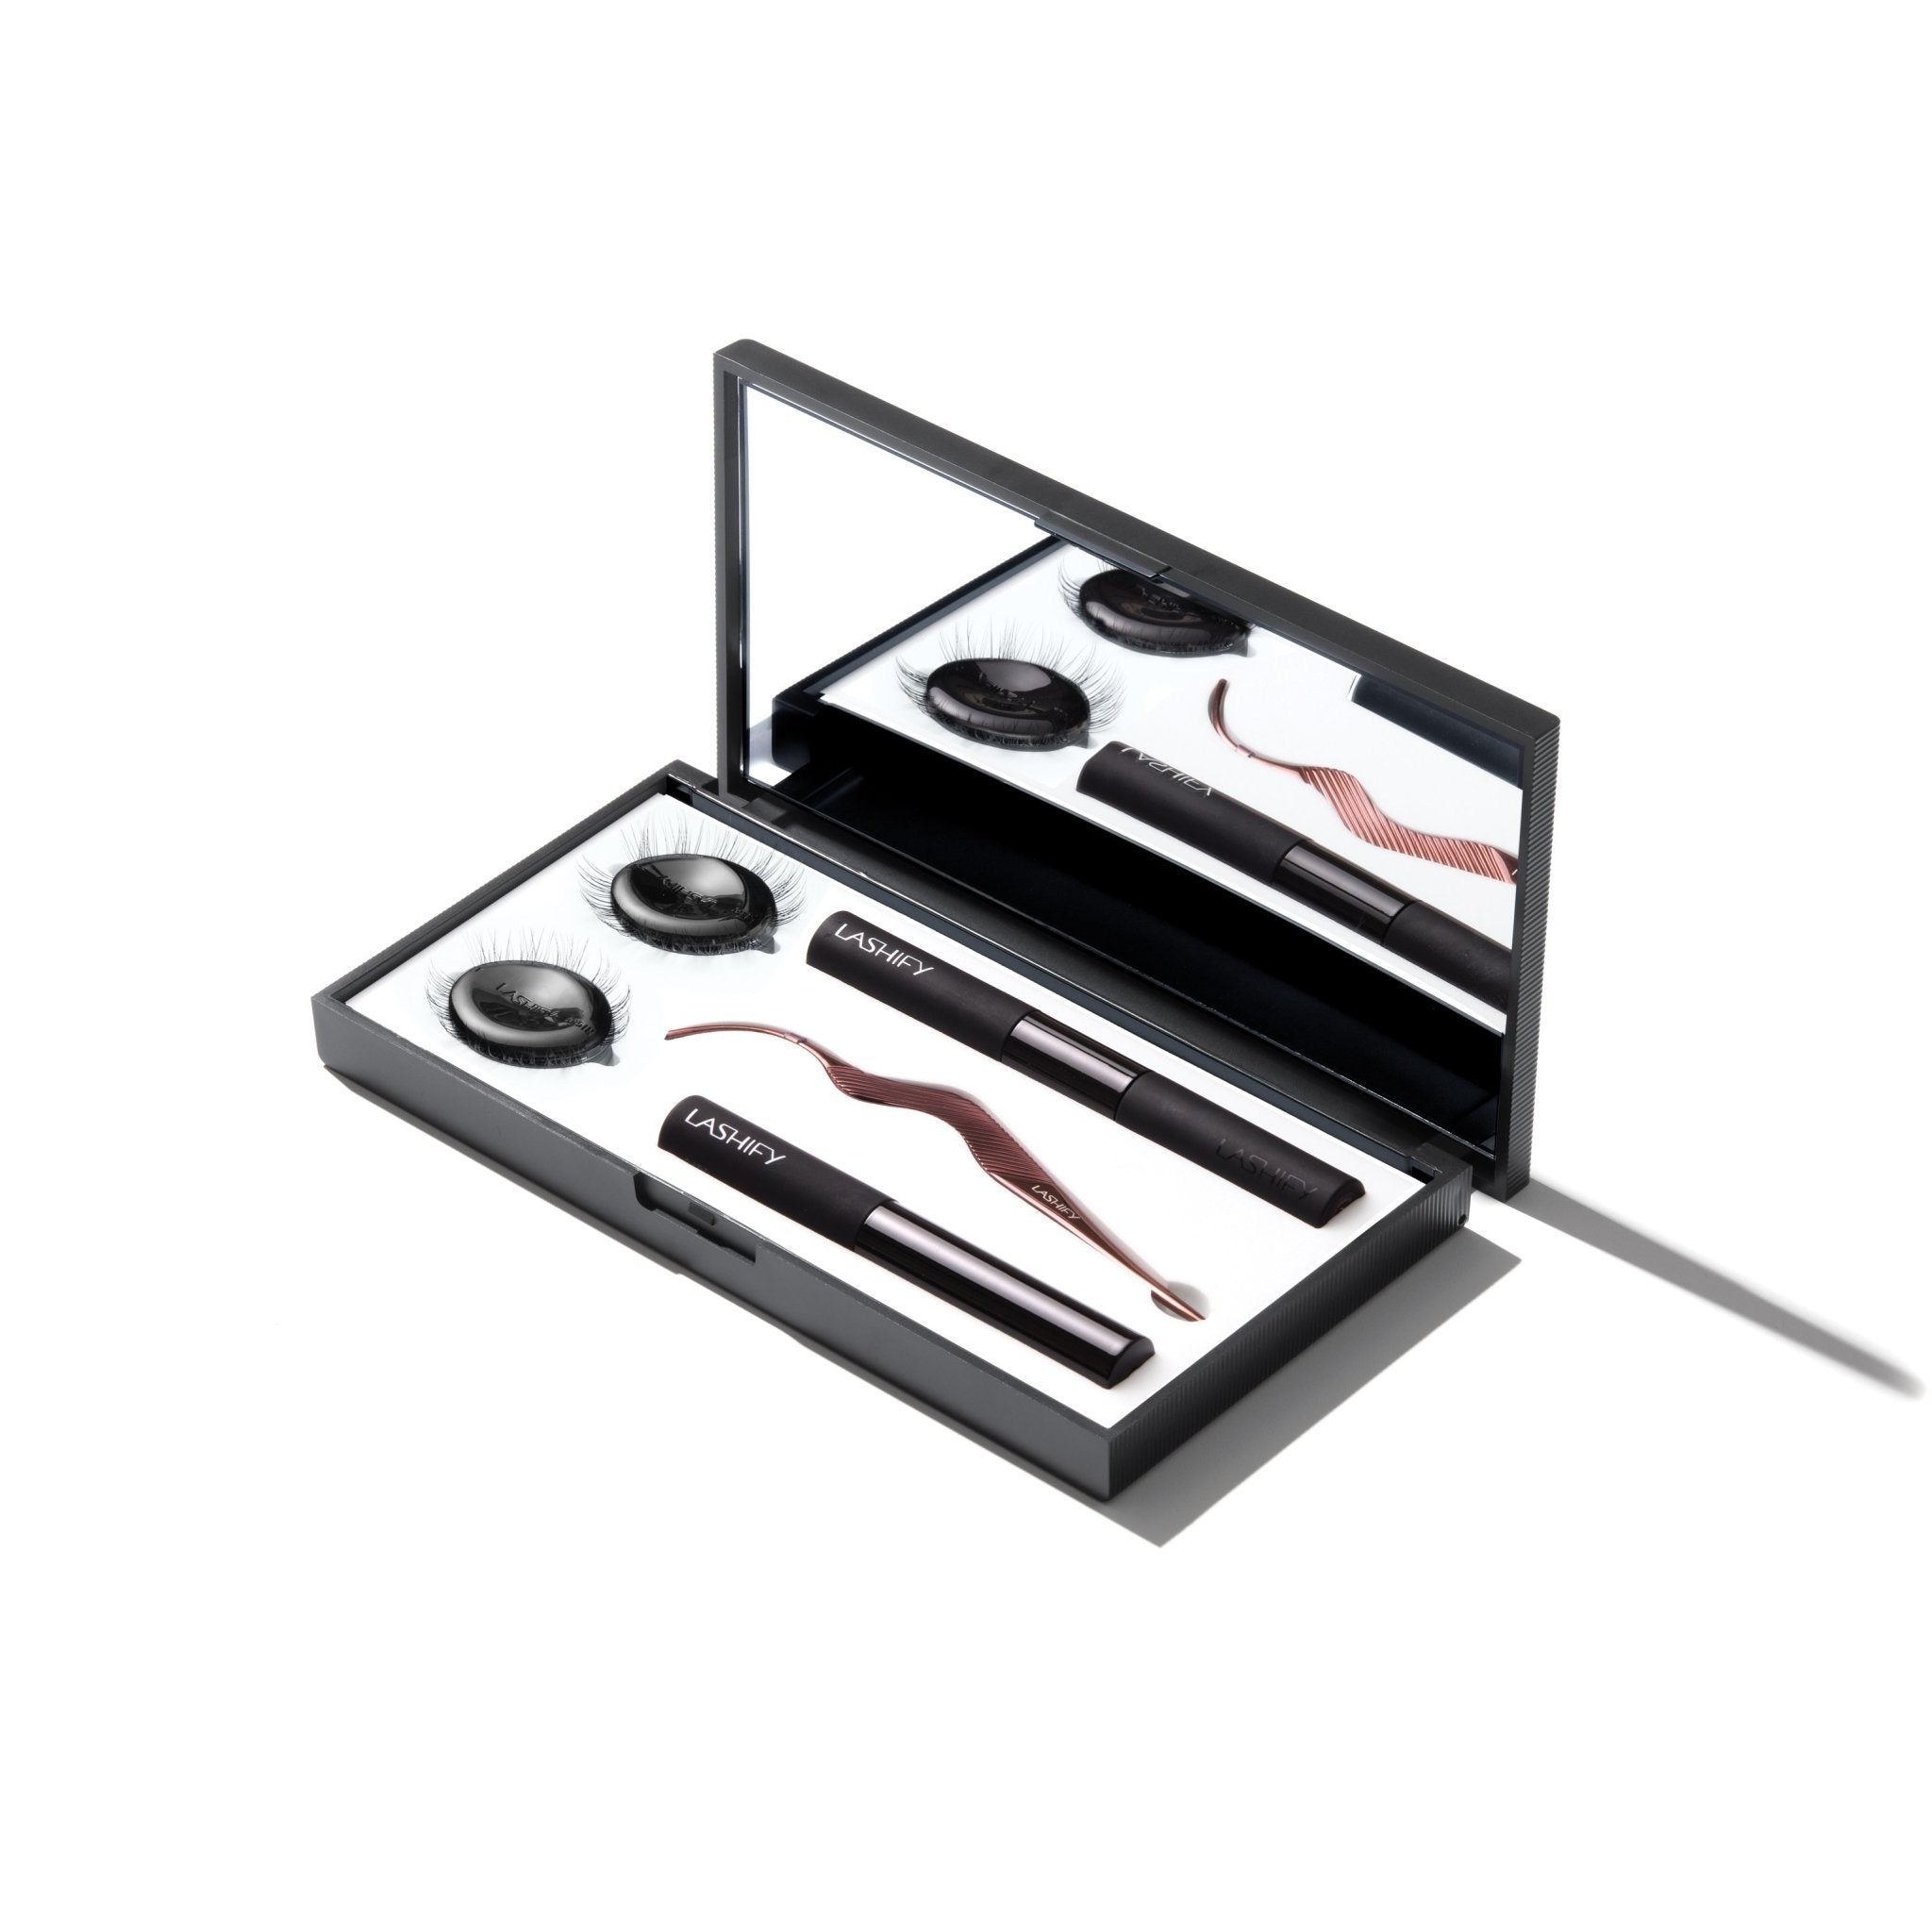
The Control Kit
Harness the power of Underlash Technology with all the tools you need from the OG’s of DIY Lash Extension. Lashify sends you everything in one easy and convenient kit.
Each Control Kit comes with:
- Two sets of Gossamer lashes. Choose from Bold, Amplify, or Curl. Our Gossamer lashes are made from 100% Korean PBT silk and are designed to be completely weightless. They’re attached to a feather-light spine that makes them easy to apply and helps distribute the weight evenly across your lashes.
- Fuse Control® Wand. Application couldn’t be easier with the Fuse Control Wand, our ergonomically designed applicator tool is curved to flow naturally with the rounded shape of your eyelid and feel comfortable in your hands. For smaller hands and faces, the Petit Curve Wand is the solution. The Petit Curve mimics our Fuse Control Wand but is slightly smaller.
- One set of Wandoms®. Wandoms cover the tips of your Fuse Control Wand so that the Bond doesn’t cause your Gossamer lashes to stick to the wand during application. Bonds get tacky before application, so Wandoms keep you from getting in a sticky situation.
- Whisper Light Bond™. Unlike other lash glue, our Bonds don’t contain formaldehyde-releasing chemicals or cyanoacrylates. Lashify Bonds contain biotin and Lavandula, like a lash serum, and they never fully cure. That means they never become brittle or stiff, which can lead to your lashes breaking and becoming damaged.
- Glass Finishing Coat. Although your Gossamer lashes don’t have to be sealed, we offer several sealants to help increase the longevity of your Gossamer lashes. Glass will give your Bonds extra staying power so your Gossamer lashes can last up to ten days with proper care.
- Samples. We’ll throw in a sample of Pre Cleanse and Melt Away so you can give them a test drive before you commit. Pre Cleanse Japanese Cleansing Water also doubles as a gentle yet effective facial wash. Melt Away is our dual-phase, oil-based makeup remover that helps you gently remove your Gossamer lashes when you’re ready to take them off.
With your Control Kit in hand, you’re ready to start applying your Gossamer lashes beneath your lash line and enjoy beautiful, comfortable lashes right away.
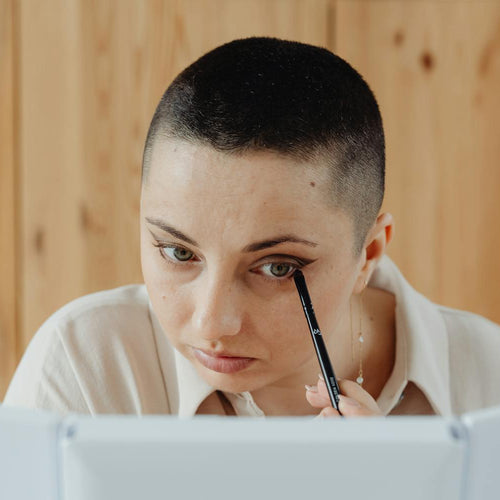
Applying Lashes Under Your Lash Line
The Lashify system is easy, but it will take you a few times to feel completely comfortable applying your lashes. We recommend giving yourself about half an hour the first time you apply your lashes. Once you master the technique, you can probably get them on in under 10 minutes.
Step 1
Cleanse your face and remove any existing eye makeup. Make sure you use an oil-free cleaner (like Pre Cleanse). Oil can loosen the Bonds and affect the application process. Make sure your eye area is completely dry before you begin applying your Gossamer lashes.
Step 2
Using your preferred Bond, apply a thin coat through your lashes, and wait about 30 seconds after you’ve applied the Bond so that it becomes tacky. You can apply a second coat of Bond near the base of your lashes (near the water line), focusing on the inner and outer corners of your lashes to help these areas have staying power.
Step 3
Using your Fuse Control Wand, pick up your first Gossamer lash extension and place it underneath your natural lashes, close to (but not on) your water line. Start by placing your first Gossamer lash extension in the center of your eye and work outward toward the outer corner. Then, apply the remaining Gossamer lashes to the inner corner of your lash line.
Step 4
Using your Fuse Control Wand, perform the Fuse of your choice to ensure your Gossamer lashes are fully sealed onto your natural lashes. That’s it. In just four easy steps, you’ve applied your lash extensions to the underside of your natural lashes.
Tips and Tricks
Even though it’s easy, there are some tips and tricks that can help you avoid issues with application.
- Apply your Gossamer lashes slightly further away (about 2mm) from your water line the first time you apply them. This will help you line up the spines of the Gossamers and ensure proper application.
- Apply your Gossamer lashes spine to spine. It’s possible to overlap spines to create different looks, but if you are just beginning, save those techniques for later.
- If you make a mistake, just lift the Gossamer off of your lash line and restart. If you can’t get the Gossamer lash off by Gently lifting it with your Fuse Control Wand, try using a lash comb or Melt Away to gently slide the Gossamer off of your lash and start the application process over.
Be patient with yourself. This is a new technique, and it won’t take long for you to get the hang of it, but expect to make a few mistakes the first time.
Going Under
Under-the-lash extensions are natural, comfortable, and safer for your natural lashes. When you’re ready to level up your lash game, get Lashify.
Lashify is the inventor of the underlash method, and our Gossamer lashes are specifically designed to be applied underneath your natural lashes for long, comfortable wear.
Sources:
Your Eyelashes Should Be This Long, Science Says | Scientific American
Is Eyelash Glue Toxic? | Poison Control
Biotin | Health Professional Fact Sheet
Curious About Eyelash Extensions? Here’s What You Should Know | NY Times